
personalized mailer boxes
Showing all 2 results
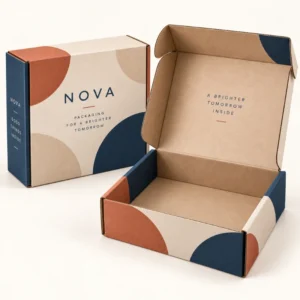
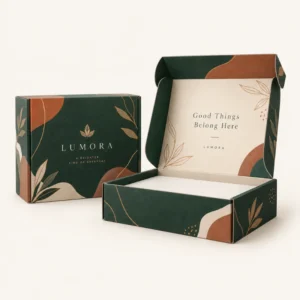
personalized mailer boxes are printed, self locking boxes with a hinged lid, made for ecommerce orders that need to arrive looking as good as they did when they were packed. They combine an outer shipping box and a presentation box in one piece, so the customer opens the parcel and immediately sees the brand, not a plain inner carton. For online brands, that single box can carry the whole arrival experience.
Why personalized mailer boxes work for ecommerce
Mailer boxes solve a common ecommerce problem. A plain shipping carton protects goods, but it does not present them. A separate gift box presents goods, but it needs an outer carton for posting, which adds size, weight and packing time. A mailer box does both jobs. Its corrugated construction protects in transit, its lid opens like a presentation box, and its print can run across the outside, the inside lid, or both.
The structure also helps packing. A mailer box folds up quickly, often without tape on the base, and it stays square while it is filled. That speed matters in a busy dispatch area, where a box that needs taping, folding and checking at several stages will slow the team down. A consistent mailer size also helps with storage, because flat packed mailers stack neatly and can be pulled in order during a packing shift.
For the customer, the opening sequence is the point. A mailer lid that lifts to reveal tissue, a printed message, or neatly arranged products feels deliberate. A box that opens to loose fill and a jumble of items feels rushed, even if nothing is damaged. Designing the inside, not just the outside, is therefore central to mailer box success.
Choosing mailer construction and board
Most mailer boxes use corrugated board, with an E flute or B flute for lighter goods and a stronger construction for heavier or fragile goods. Kraft board gives a natural look and a good surface for bold, simple print. White board gives a bright surface for full colour print and photographic artwork. The choice should follow the product weight, the distance travelled, and the look the brand wants on opening.
Consider the closure. A tuck front mailer closes neatly and opens easily, which suits gifts and clothing. A mailer with a tear strip opens quickly but cannot be resealed easily, which suits single use dispatch. A mailer with a reseal area suits returns, because the customer can close it again without extra tape. Test the closure with real products, because a closure that works empty can fail when the box is full.
Testing mailer strength
Pack a mailer with the heaviest realistic order, close it, and stack two or three packed mailers on top of it. Leave them for a day, then open and inspect for crushed corners, bowed lids or damaged contents. Repeat the test after posting a sample to yourself. A mailer that passes a table test but fails in transit will still disappoint customers, so the posted test is essential.
Print inside and outside personalized mailer boxes
Outside print is for recognition. A logo, a brand colour and a clear sender name help the recipient identify the parcel and help it stand out in photographs. Keep outside print bold and simple, because labels, tape and handling marks will cover parts of it. Place the main logo where it will not be hidden by the address label, and keep text large enough to read from a normal carrying distance.
Inside print is for the opening moment. A pattern, a message, a set of care instructions or a simple illustration on the lid can turn an ordinary opening into a brand moment. Inside print is also practical, because it can carry a thank you note, a discount code for a next order, or guidance on returns, without a separate insert that can be lost. Keep inside text short, because the customer will read it while unpacking, not while studying a brochure.
Colour choice matters on both sides. On kraft board, colours look warmer and more muted. On white board, colours look brighter and more exact. Check proofs on the actual board you will use, in daylight and in indoor light, because a colour that looks right on screen can look different on board. If colour accuracy is critical for your brand, ask how proofs are checked before approval.
Inserts, tissue and product arrangement
Inserts turn a mailer box from a container into a presentation. A fitted insert holds products in place, prevents movement, and creates a clear arrangement on opening. Tissue paper adds a layer of care and can hide products for a reveal, but it should not be so much that the customer must dig through it. A card or booklet can explain the order, suggest how to use a product, or tell the brand story in a few sentences.
Arranging products for opening
Place the most visually appealing item on top, or in the centre, where it is seen first. Place heavier items at the base, so they do not crush lighter items. Keep small items in a pouch or a compartment, so they are not lost in fill. Photograph the arrangement as you pack a trial, because that photograph becomes a packing guide for staff and a check for consistency.
Ordering, sizes and lead times
A clear mailer brief includes product dimensions, packed weight, number of items per order, fragility, print areas, board preference and monthly volume. Note whether the mailer will be posted on its own, whether it needs a returns reseal, and whether you need the same design in more than one size. Those details help a supplier suggest a construction that works in practice, not just on paper.
After final artwork approval, standard lead times are 10 to 14 working days, corrugated lead times are 12 to 15 working days, and rigid or specialist lead times are 13 to 16 working days. Those figures are a planning guide, not a guaranteed delivery date. Allow time for artwork proofing, a posted trial, and a packing trial with staff, because a mailer that looks good in a sample may need a small change after real dispatch.
Before a full run, post trial mailers to several addresses and ask recipients to photograph the box on arrival and on opening. Look for scuffed print, crushed corners, loose contents and labels that have covered key artwork. Fix those issues, then scale up. To plan, see the delivery information page, browse the shop for packaging options, request a quote for your mailer box design, or compare personalised postal boxes for online sellers. For size planning, check the Royal Mail size and weight guide.
Storing and assembling mailers
Store flat mailers in a dry place, stacked by size, with the current design easiest to reach. Assemble a small number in advance for urgent orders, but keep the bulk flat to save space. Train packing staff on the fold sequence, because a mailer assembled in the wrong order can look untidy and can weaken the closure.
Frequently asked questions
What is a mailer box?
A mailer box is a printed, self locking box with a hinged lid, made from corrugated board. It protects goods in transit and presents them on opening, without a separate outer carton.
Can I print inside a mailer box?
Yes, inside lid print is a common choice for a message, a pattern or care instructions. Outside print is best for brand recognition, while inside print creates the opening moment.
Are mailer boxes good for fragile items?
Yes, with the right board and insert. Choose a stronger board for heavy or fragile goods, use a fitted insert to stop movement, and test a posted sample before a full run.
How long does production take?
As a guide, corrugated production is 12 to 15 working days after final artwork approval. Standard production is 10 to 14 working days, and rigid or specialist production is 13 to 16 working days.
Do mailer boxes need tape?
Many mailer boxes close without tape on the base, but tape is often used on the outer seal for posting. Test the closure with real orders to decide whether tape is needed for your products.